How I Use Trello At Work
October 26th, 2014
Trello is one of my favorite tools. I use it extensively for project management, organized brainstorming, personal to-do-lists, day-by-day collaboration, etc. Today I will share how I use Trello to organize the technical roadmap of a digital team involving both business and IT stakeholders.
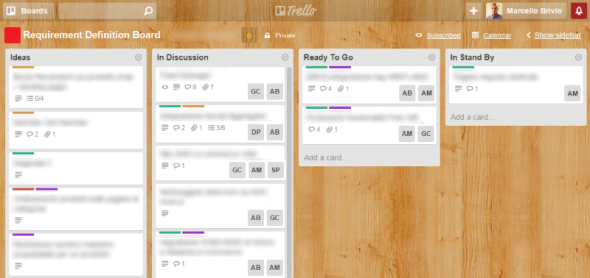
I organized our project workflow on Trello in 2 boards: the first one is called “Requirement Definition Board” and the second one is the “Development Board”
NOTE: I assume you already know Trello’s fundamentals (boards, lists, cards, notifications, etc.): if you don’t, this video will be a good starting point.
The Requirement Definition Board
The first board is dedicated to project discussion and requirement gathering. Only people from the business and marketing team should have access to this board because usually there’s is no technical involvement at this stage.

The board is divided into 4 lists:
- Ideas: this is the entry point of every project and feature request. Anyone can create a card in this list, e.g. “New Payment Processor”, “Improved Search UX”, etc. This is very useful to quickly keep track of new features or issues to be investigated even if there is no time to get in the detail. People in the team can vote their favorite “Ideas” using the appropiate button on the card. Trello colorful labels are useful to indicate the area(s) involved, for example we use “SEO”, “Social”, “Content”, “UX”, “Backend” and of course a red label for “Priority 1″ items.
- In Discussion: “Ideas” should be discussed in weekly or bi-weekly internal meetings where the team can see what’s on the table and what should have the priority. When an “Idea” moves on to become a real project, its card is dragged to this second list. Here any project is assigned to one or more team members that will discuss the requirements using the amazing features of Trello cards: comments, checklists, attachments, etc.
- Ready To Go: once the discussion process has ended, a Project Requirement Document (PRD) must be attached to the card and it’s moved to this list. The PRD is intended to be a small DOC or PDF providing to the IT a complete and clear vision of what the business team expects as an output for that project. The IT will then start from this PRD to deliver a more detailed and technical specification for the development team.
- In Stand By: I added this list because sometimes project that are “In Discussion” or even “Ready To Go” can be blocked for various reasons. In those case, they stay in this list waiting for their time to come (or for the “Archive” button to definitely dropping them from the table).
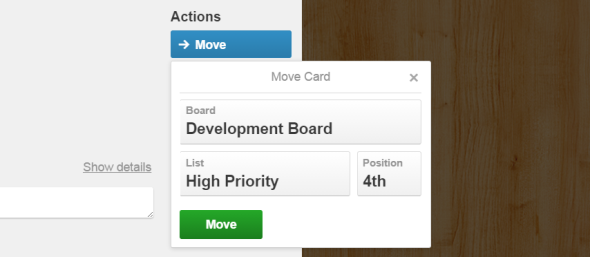
As you can easily understand, cards will flow from left to right in the board as the projects they represent move on. When a project is “Ready To Go”, it is brought to the attention of the technical team in a peridocal Roadmap Meeting where each new project is quickly discussed starting from its PRD, defining its priority and a target release date: at this point, the card is moved to the Devolpment Board through the useful “Move” button (see below).
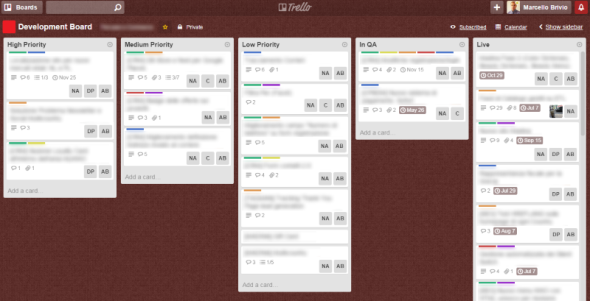
The Development Board
The main purpose of the Roadmap Meeting is to assign a priority and a target date to each project, often changing priorities and target dates of previously discussed projects. If you are in a very dynamic environment, you’ll know it’s not easy to offer a clear vision of what’s going on. The Development Board board helps me in this stage and I use it extensively during Roadmap Meetings and anytime I need a quick look of what we are working on.
The Development Board is accessed by both business and IT team, and if you work with external suppliers it would be a good idea to let their Project Managers come in, too.

I organized the Development Board with 5 lists:
- High Priority, Medium Priority and Low Priority: cards from the “Ready To Go” list are moved in one of these 3 lists in relation to their priority. During Roadmap Meetings it’s very easy to re-arrange priorities dragging & dropping cards. One ore more people from the technical team are added as members to each card, while keeping its original members from the business team. Within this board, the discussion inside the cards is usually more technical and focused on keeping track of progress and issues. When a card represents a big project, checklists are useful to split it in small tasks. Trello’s “Card Aging” power-up makes it easy to see if a card is stuck with no activity.
- QA: when a project is deployed in our staging environment, its card is moved to this list. The QA process is started.
- Live: if everything went well, the card comes to this final stage when the related project is deployed live.
A Note On Notifications
Note that Trello’s excellent notification system allows people in the team to be constantly updated about any change happening on the projects they are involved on. For this reason it’s very important to assign members to cards: remember that a card’s member will be notified for anything happening on that card, making it very easy to follow a project’s path from “Idea” to “Live”.
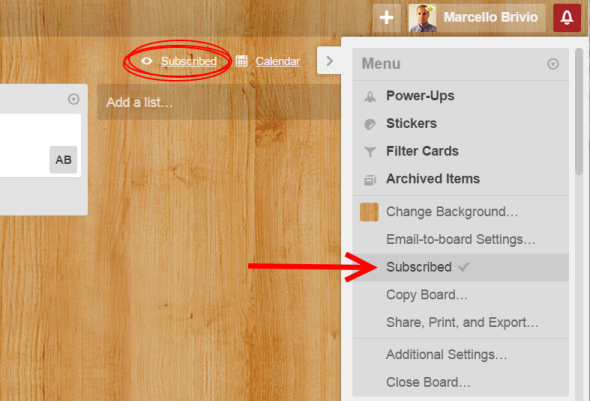
Anyway, if you are the Project Manager in charge to oversee the whole roadmap, the best thing to do is subscribe to the whole boards: in this way, you will be notified for any activity of the team.


defining output is important indeed !